Printer cameras in brief
- A camera saves prints. Remote checks catch a lifted first layer or loose strands hours before the print would finish.
- Placement matters more than resolution. A view from above shows the first layer, while a side view only shows the edge of the plate.
- Setup takes a few minutes on printers that run Klipper with Moonraker. Add a camera section to
crowsnest.conf, restart the camera service and add the camera in the web interface. - Focus by hand. Cheap board cameras have a screw-in lens that turns to focus.
- AI can watch. Snapshot links let failure detection tools and AI assistants check the print at set times.
Benefits of a printer camera
Long prints fail in a few common ways. The first layer peels up, a support breaks loose or the filament runs out. Sometimes a part comes loose and the nozzle keeps printing into the air. The result is a tangle of loose plastic strands, informally called spaghetti because of how it looks. Each one wastes filament and hours of printing if unnoticed.
A camera turns those failures into short delays.
- Remote checks. The printer's web page shows a live view from a phone or another room.
- First-layer checks. Most failures start in the first few layers. A clear view of them is worth more than any other picture.
- Clear plate before a remote start. A quick look confirms the last part was removed.
- Time-lapses. The Moonraker time-lapse plugin takes one frame per layer and builds a video when the print ends.
- Evidence after a failure. The time-lapse shows the layer where things went wrong, which makes the cause easier to find.
- Automatic failure detection. Tools like Obico and the AI detection built into some printers watch the camera for spaghetti.
Built-in camera limits
The QIDI Plus 5 has a chamber camera mounted low on the chamber wall, about level with the build plate. QIDI's spec sheet lists it as up to 1080p with time-lapse support, and QIDI's store page adds AI detection. Retailers describe it as a low frame rate camera. On the printer used here, the camera reported only two picture sizes, 640 × 480 and 1280 × 720. The stock setup streamed it at 640 × 480 and 15 frames per second.
The bigger limit is the angle. The camera looks across the plate, almost edge-on. During the first layers, it shows whether the nozzle touches the part and whether strands hang off it. It cannot show the surface of a layer. On the same printer, a print reported as fine by this camera turned out to have a patchy top when it was checked in person. Another failure, where small feet had peeled off the plate, only became clear from a phone video shot from above.
innomaker U20CAM-1080P
The camera added here is the innomaker U20CAM-1080P, a bare circuit board with a lens, sold for $18.99 in November 2026. It is a UVC camera, the standard type that Linux, Windows and macOS use without drivers. It outputs MJPEG video at up to 1920 × 1080, and the printer listed six other sizes from 640 × 360 up. The maker gives a 130° diagonal field of view and an M12 lens mount, the common screw-in lens size for small cameras. One buyer's review measured a narrower view than listed, so treat the angle as approximate.
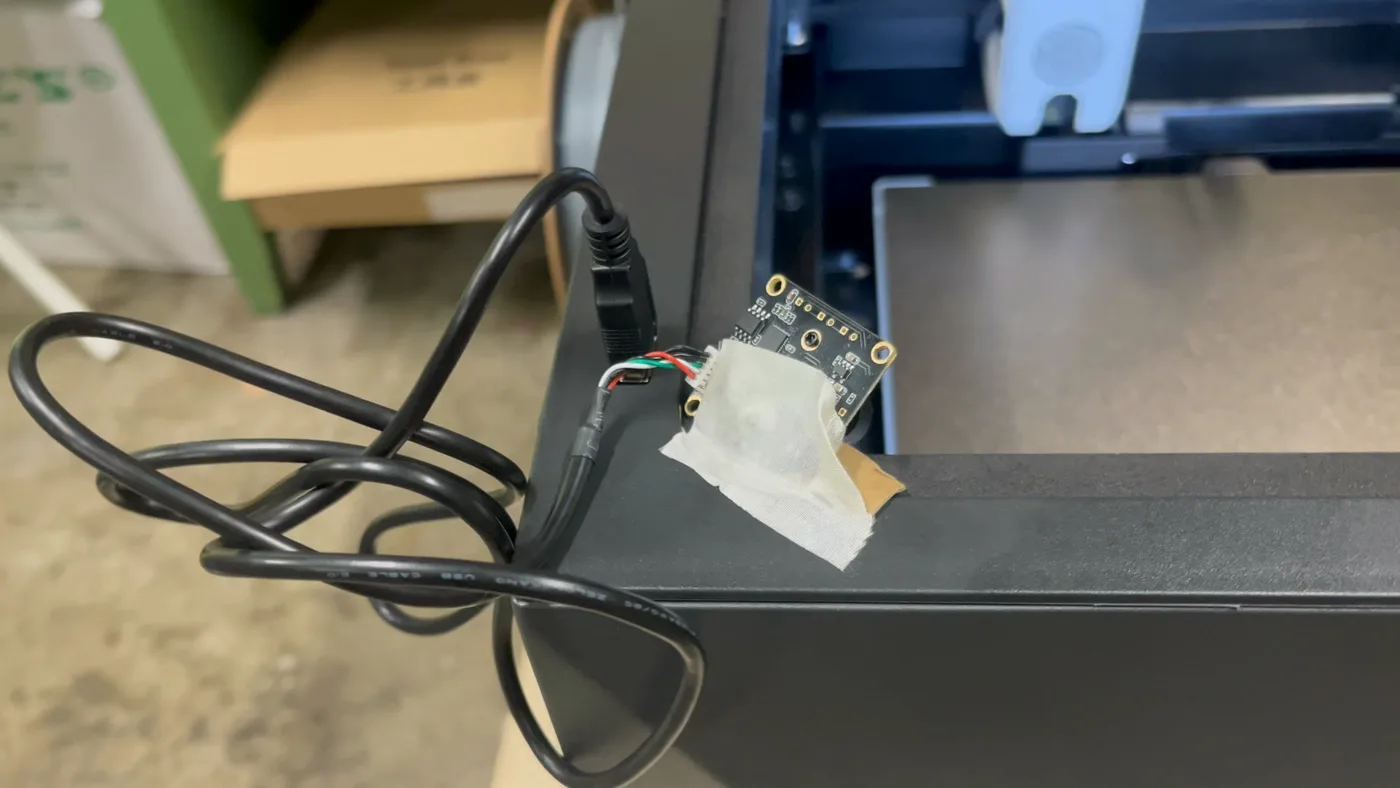
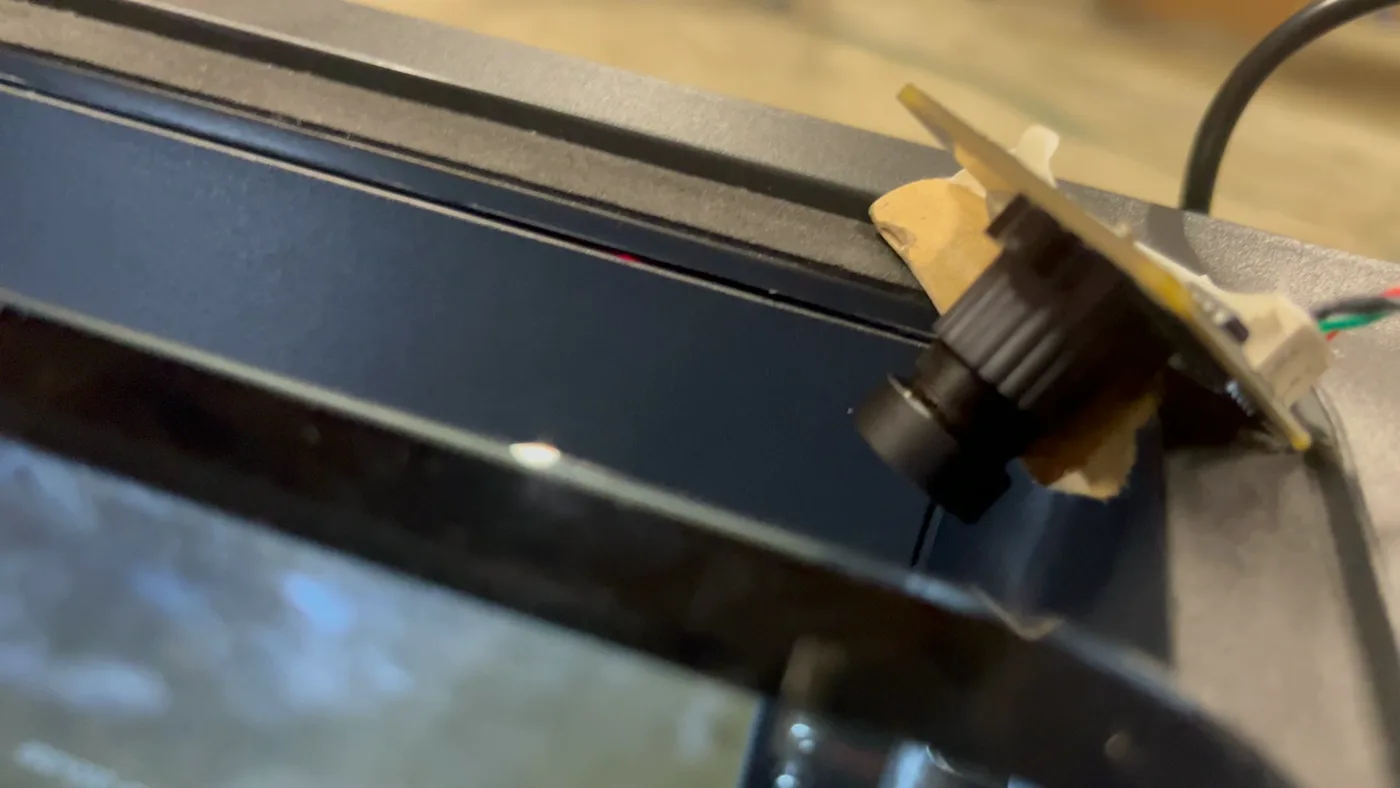
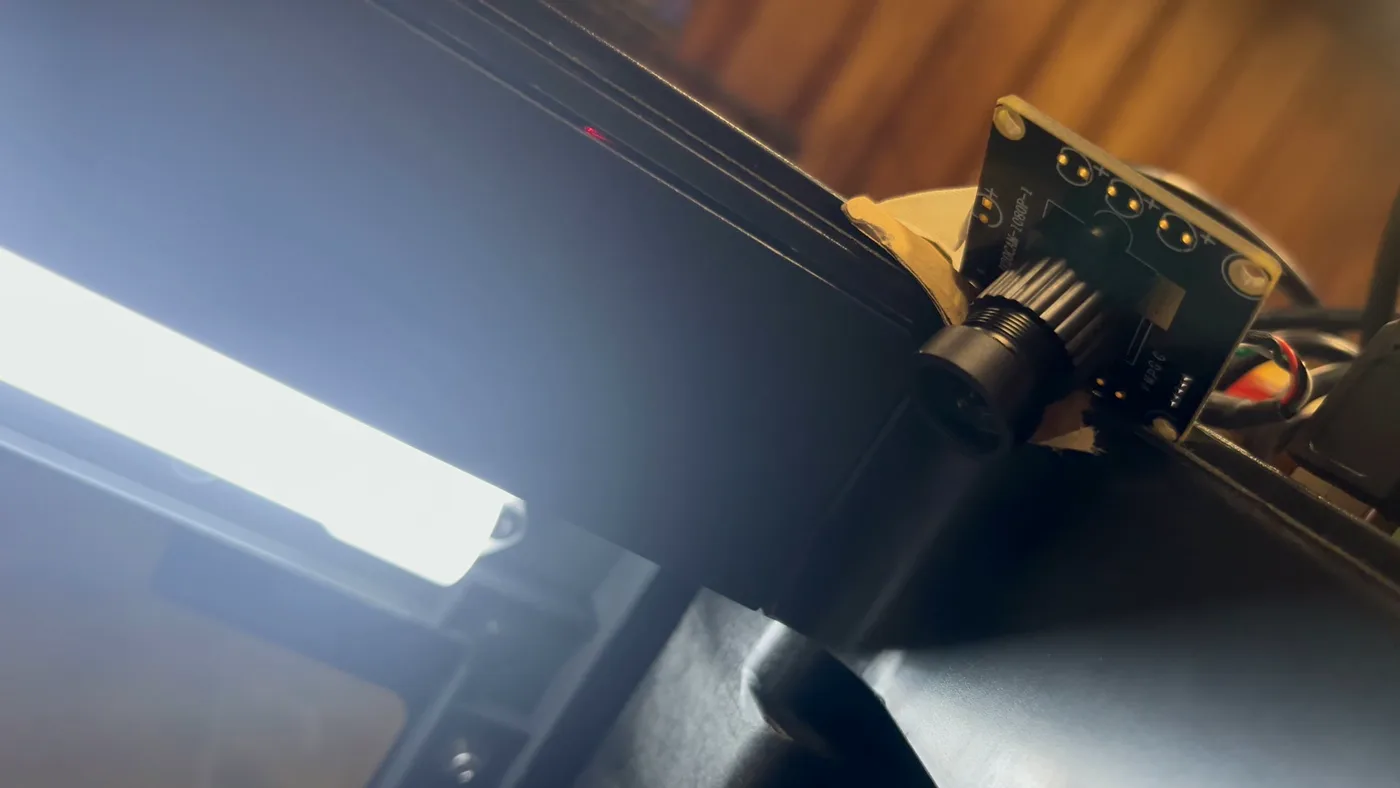
Its USB cable is wired to the board, and there is no case. Buyers report that the lens turns to focus, though the listing's own focus details are inconsistent. The board here is simply taped to the top front corner of the printer's frame, with the lens pointing down into the chamber. A printed bracket would hold it more securely.
Camera comparison
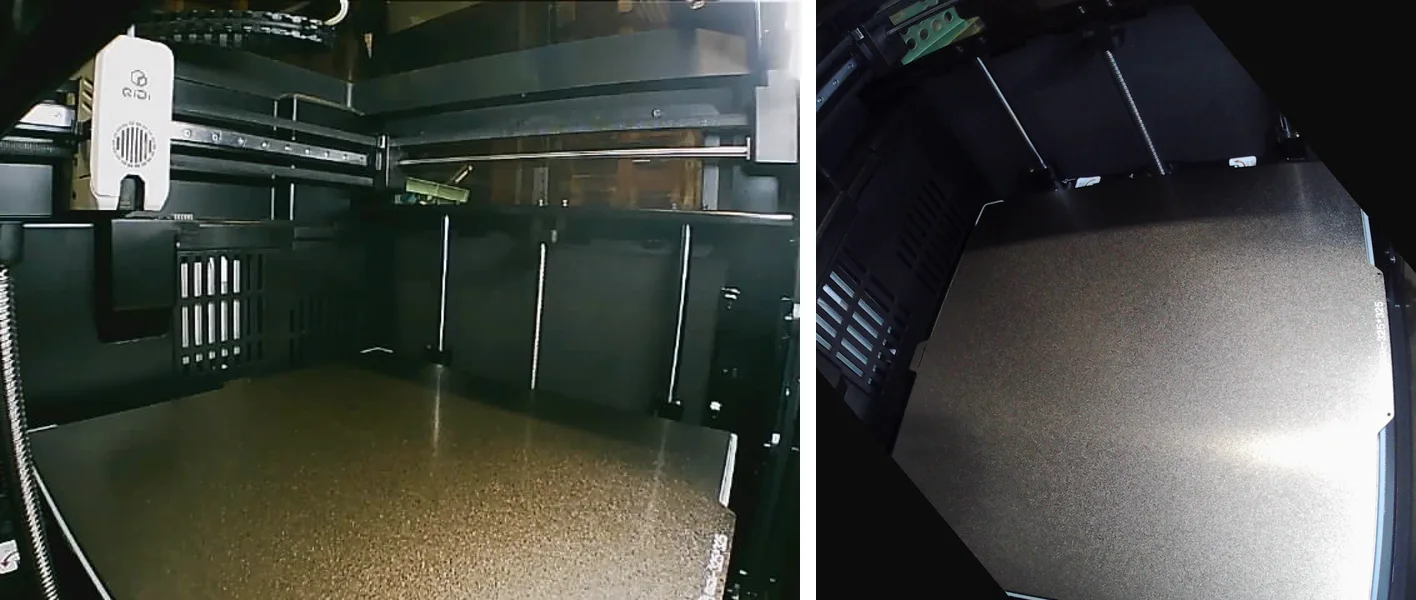
The pictures below were taken by both cameras at the same moments. The built-in camera is on the left and the external camera on the right. The external camera's pictures are turned by about 50° to match the built-in camera's direction, since the board was taped on at an angle.
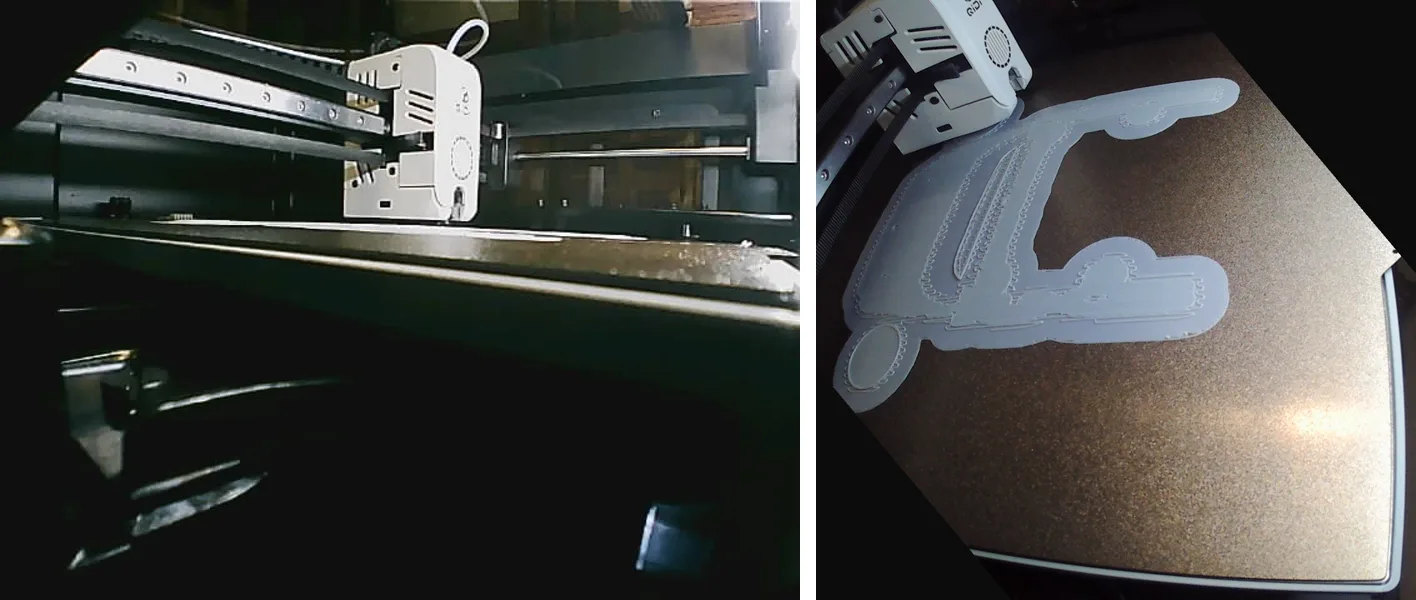
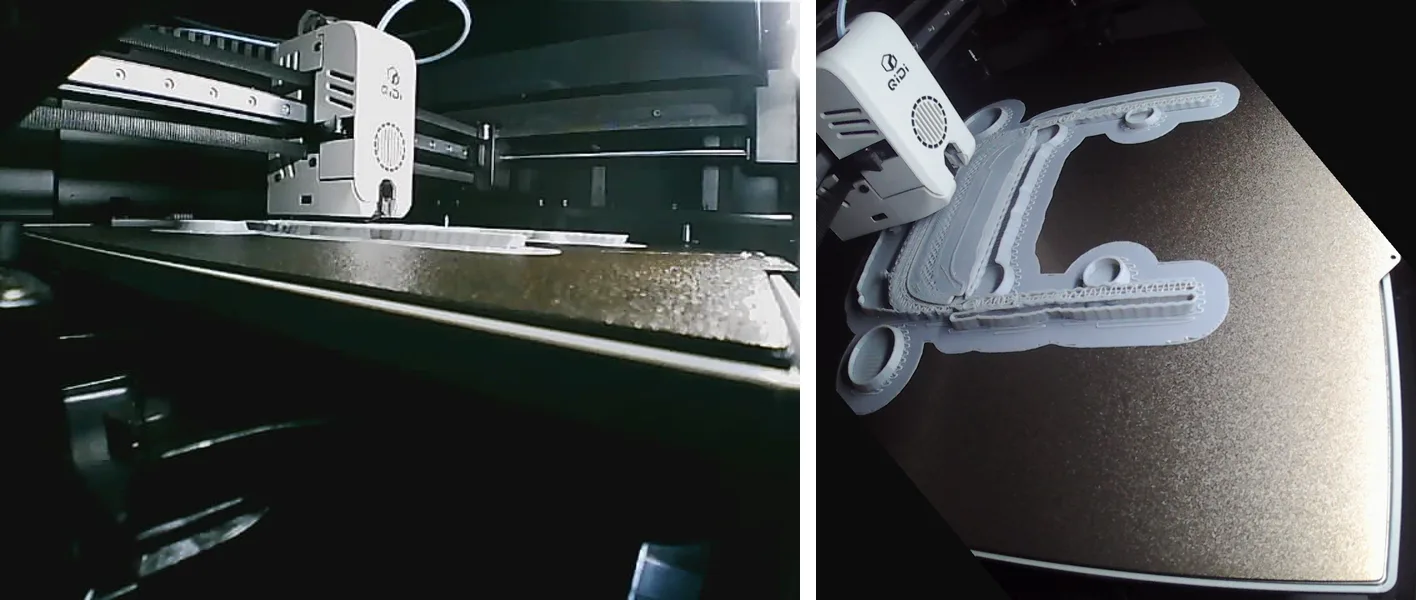
| Built-in camera | External camera | |
|---|---|---|
| Position | Low on the chamber wall, level with the plate | Top front corner, looking down |
| Picture size used | 640 × 480 | 1920 × 1080 |
| Snapshot size | 30 to 45 KB | About 215 KB |
| First layer | Edge only | Whole surface |
| Tall parts | Good side view of height and leaning | Top view, with the toolhead sometimes in the way |
| Weak points | Dim, low angle, low detail | Glare from the chamber light, wide-angle bend, toolhead passes close to the lens |
The two cameras work best together. The side view still shows a leaning part or a support falling over. The top view shows layer surfaces and the first layer.
Klipper basics
Klipper is free, open-source firmware, the software that runs a 3D printer. Older printers run all their firmware on one small chip on the control board. Klipper splits the work. A small Linux computer inside the printer, or a Raspberry Pi beside it, plans every move, and the control board only drives the motors and heaters. The extra computing power allows faster printing and makes the printer easy to reach over a network.
A few other programs usually run next to Klipper on the same computer.
- Moonraker connects Klipper to the network. Web pages, phone apps and scripts talk to the printer through it. The commands on this page that use port 7125 go to Moonraker.
- Fluidd and Mainsail are web interfaces built on Moonraker. Either one shows the printer's status, cameras and settings files in a browser.
- Crowsnest is the camera service. It turns each USB camera into a live stream and a snapshot link.
Many printers ship with Klipper already installed. They include the QIDI Plus 5 and other recent QIDI printers, the Elegoo Neptune 4 series and Creality's K1 series, which uses a modified version. Voron and other kit printers usually run it too. Printers with their own closed firmware, such as Bambu Lab models, do not use these steps. A printer's web page is a quick check, since a Fluidd or Mainsail page means it runs Klipper.
Setup on a Klipper printer
These steps are for printers that run Klipper with Moonraker and the Crowsnest camera service, which includes the QIDI Plus 5 and many other printers. Replace PRINTER_IP with the printer's address on the local network. On the Plus 5 it is shown in the touchscreen's network settings.
1. Plugging in
Plug the camera into a free USB port on the printer. The Plus 5 has one at the front left. Then check that the printer sees it. Moonraker lists every camera it finds.
curl http://PRINTER_IP:7125/machine/peripherals/videoEach camera appears with a path_by_id and a list of modes. Note the path, which stays the same after a restart. The path for this camera is shown below. On a printer whose Moonraker is too old for this request, ls /dev/v4l/by-id/ over SSH lists the same paths.
/dev/v4l/by-id/usb-Innomaker_Innomaker-U20CAM-1080p-S1_SN0001-video-index0The modes list shows the picture sizes the camera offers. Pick an MJPEG size, since MJPEG needs little work from the printer's small computer.
2. Camera section in crowsnest.conf
Open the web interface (Fluidd on the Plus 5, at http://PRINTER_IP:10088) and go to the Configuration page. Download a copy of crowsnest.conf first as a backup. The file already has a [cam 1] section for the built-in camera. Leave it as it is and add a second section at the end.
[cam 2]
mode: ustreamer
port: 8081
device: /dev/v4l/by-id/usb-Innomaker_Innomaker-U20CAM-1080p-S1_SN0001-video-index0
resolution: 1920x1080
max_fps: 15
Each camera needs its own port. The first camera uses 8080, so 8081 is the usual choice for the second.
3. Camera service restart
Save the file and restart Crowsnest, either from the web interface's power menu or with one command.
curl -X POST "http://PRINTER_IP:7125/machine/services/restart?service=crowsnest"The built-in camera drops out for a few seconds during the restart, so do this between prints. After about 30 seconds, test the new camera in a browser.
http://PRINTER_IP/webcam2/?action=snapshotThe printer's web server passes the camera ports on at /webcam/ for the first camera and /webcam2/ for the second. Standard Klipper images provide /webcam/ through /webcam4/ for ports 8080 to 8083. On the Plus 5 the ports themselves, 8080 and 8081, are not reachable from another computer, so the /webcam2/ address is the one to use. If the picture does not appear, the Crowsnest log on the web interface's Configuration page shows whether the camera started.
4. Camera in the web interface
To show the camera on the printer's dashboard, open Fluidd's Settings, go to Cameras and press Add Camera. The dialog has these fields.
- Name of choice, such as "Top camera"
- Flip horizontally, Flip vertically and Rotate by, for a camera mounted upside down or on its side
- Stream type MJPEG Adaptive, which pulls snapshots at a set frame rate and copes better with a weak network than the plain MJPEG stream
- FPS Target 15, and a lower FPS Target when not in focus
- Camera Url Stream
/webcam2/?action=stream - Camera Url Snapshot
/webcam2/?action=snapshot
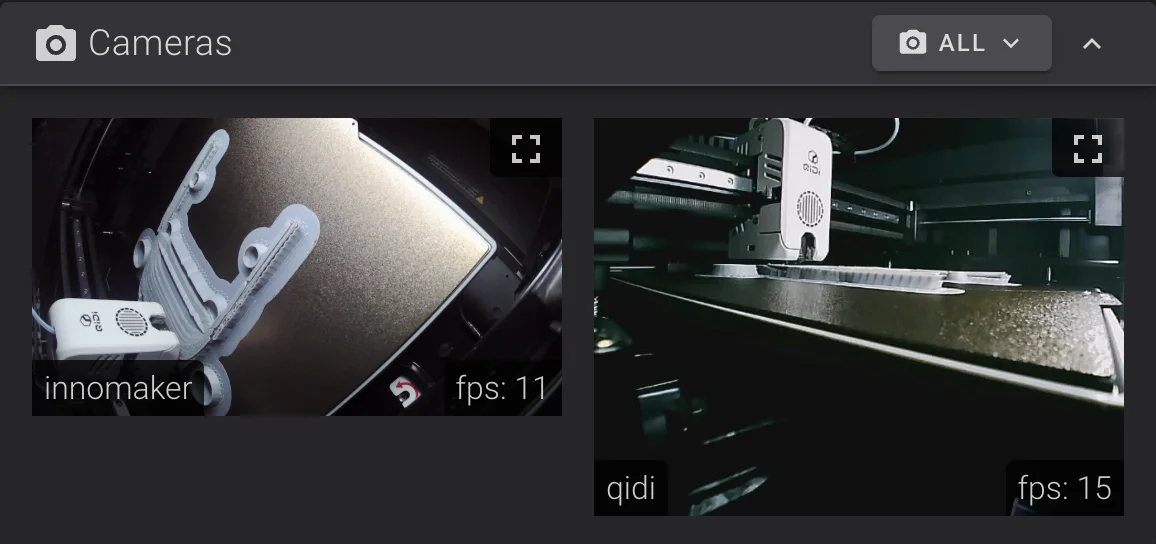
The same can be done with one Moonraker command, which saves the camera for every web interface that reads Moonraker's list.
curl -X POST http://PRINTER_IP:7125/server/webcams/item \
  -H "Content-Type: application/json" \
  -d '{"name":"Top camera","service":"mjpegstreamer-adaptive",
       "stream_url":"/webcam2/?action=stream",
       "snapshot_url":"/webcam2/?action=snapshot",
       "aspect_ratio":"16:9","target_fps":15,"enabled":true}'
The rotation options go in steps of 90°. Cameras defined in moonraker.conf cannot be changed this way, only ones added through the web interface or this request.
5. Time-lapse camera
The Moonraker time-lapse plugin records from one camera only, chosen in the web interface's time-lapse settings. Switching it to the new camera gives a time-lapse from above, and the built-in camera then records none. To keep both, a small script on another computer can save one snapshot from each camera whenever the layer number changes. Moonraker reports the layer, and each camera's snapshot link returns a JPEG. The comparison pictures on this page came from a script like that.
curl -s "http://PRINTER_IP:7125/printer/objects/query?print_stats"
curl -s -o cam2_layer0030.jpg "http://PRINTER_IP/webcam2/?action=snapshot"
Focusing and aiming
Board cameras like this one have a manual lens. It screws into the M12 mount, and turning it moves the focus. The factory setting may suit a different distance than the plate, so the picture can start out soft. The camera used here arrived sharp enough to show the plate's texture, so its lens was left alone. If the picture is soft, the steps below fix it.
- Open the live stream at full size on a computer, at
http://PRINTER_IP/webcam2/?action=stream. - Turn the lens slowly while watching the texture of the build plate in the middle of the picture.
- Stop where the texture is sharpest. The middle of the plate matters most, since parts usually sit there.
- Fix the lens in place with a drop of glue or a small piece of tape, so heat and fan vibration cannot turn it.
Aim the camera so the whole plate fits in the frame, with the middle of the plate near the middle of the picture. Wide-angle lenses bend straight lines toward the edges, so the edges of the plate look curved. Keep the board square to the frame. A camera mounted at an angle, like the one used here, gives a tilted picture that the web interface can only rotate in 90° steps. Also check for glare. A bright reflection of the chamber light on the plate can hide the first layer, and a small change of angle moves it.
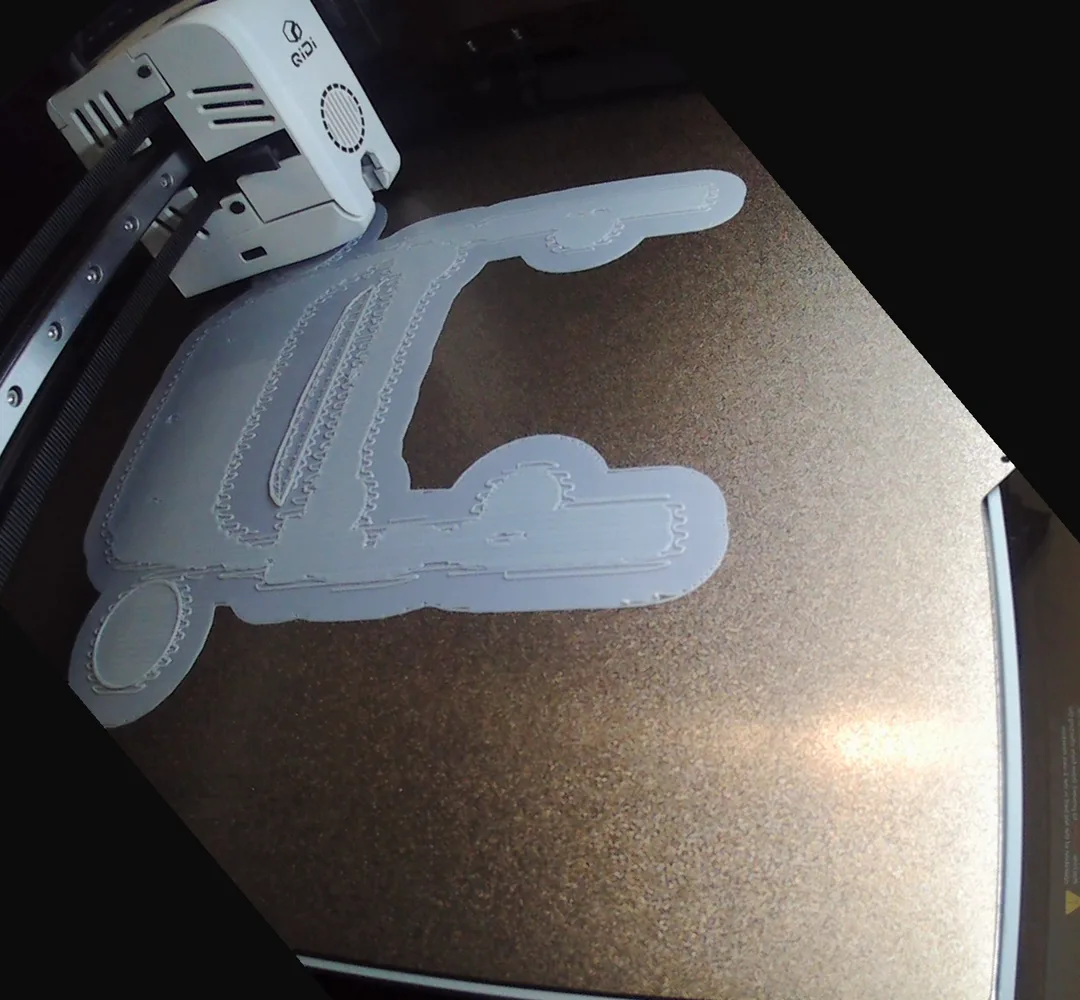
Webcams with autofocus can hunt back and forth when the toolhead moves through the picture. Crowsnest can fix the focus with a v4l2ctl line in the camera's section. The control names differ between cameras, and the Crowsnest log lists the ones each camera supports. Logitech cameras are known to ignore some settings while their automatic focus or exposure is on, so switch those off first.
v4l2ctl: focus_automatic_continuous=0,focus_absolute=30On older Linux versions the first control is named focus_auto instead, and the focus range differs between cameras. The values go in one line with no spaces, and Crowsnest needs a restart to apply them.
Inside an enclosed printer, heat is the other concern. The Plus 5 can heat its chamber to 65 °C for ABS and similar plastics. A camera kept above the chamber, or one rated for the heat, avoids trouble.
Other camera options
| Camera | Type | Focus | Notes |
|---|---|---|---|
| innomaker U20CAM-1080P | USB board, 1080p, 130° lens | Manual, by turning the lens | The camera used here. Low cost and small, with no case. |
| Logitech C270 | USB webcam, 720p | Fixed | A low-cost favorite for printers, with many printed mounts available. Close objects can look soft. |
| Logitech C920 | USB webcam, 1080p | Automatic, can be fixed | Sharper picture and fine controls. Turn off automatic focus and exposure for steady time-lapses. |
| Raspberry Pi Camera Module 3 | Ribbon-cable camera, 12 megapixels | Automatic | $25 at launch, $35 for the wide version. Needs a Raspberry Pi with a camera connector, so it suits printers run from a Pi. Some setups with Crowsnest need extra steps. |
| Arducam USB autofocus modules | USB boards, 1080p and up | Automatic | Small boards in the same style as the innomaker, with autofocus. Reviews of the focus are mixed. Bare boards need a case or bracket. |
Two other kinds are worth knowing about. A nozzle camera rides on the toolhead and looks at the plastic right as it leaves the nozzle. Obico can use one for first-layer checks. Wi-Fi security cameras also work for watching a printer, but they stream to their own app. Without extra software to pass their stream on, they do not appear in the printer's web interface or its time-lapses.
AI monitoring
Every camera added this way has a snapshot link that returns a fresh JPEG. That makes it easy for software to watch a print. Obico's failure detection uses the first camera in its settings, and QIDI's built-in AI detection uses the chamber camera. QIDI support describes its own detection as still in development and most reliable with light-colored filament on the gold plate with the chamber light on.
General AI assistants that can run commands, such as Claude, can do the same job in a more flexible way. Given network access to the printer, an assistant can read the layer number and status from Moonraker, fetch a snapshot from each camera and look at the pictures. It can describe what it sees in plain language and compare a frame with an earlier one.
The print shown on this page was watched that way. The assistant checked both cameras on the first layers, at layer 30 and at a height where thin supports were a known risk. A small script woke it at each of those layers. At layer 4, the top view showed the whole raft flat on the plate, which the side camera could not show. If something lifts, the assistant can pause the print with one command.
curl -X POST http://PRINTER_IP:7125/printer/print/pauseAI checks have limits. An assistant judges only what the camera shows, so a low side view can make a failed print look fine. It can also misread a picture. Here, an assistant first judged the external camera to be upside down from one sticker, before a second look at the toolhead logo showed it was only tilted. A top view, a check at the riskiest layers and a person's look at anything doubtful make the checks far more useful. Starting a print or changing printer settings should stay with a person.
For choosing a printer and the plastics used for robot parts, see 3D Printers for Robot Parts. Printing soft filament on the same printer is covered in the QIDI Plus 5 TPU Guide.
Sources
- Hands-on setup of an innomaker U20CAM-1080P on a QIDI Plus 5, November 7, 2026, including the printer's Moonraker device list and Crowsnest log.
- QIDI, Plus5 TechSpecs (camera, chamber temperature), and QIDI support email, October 28, 2026 (AI detection).
- Moonraker, Webcam API, and Fluidd, Cameras.
- Mainsail crew, Moonraker-timelapse configuration.
- innomaker U20CAM-1080P product manual (field of view, M12 lens mount).
- Klipper, official documentation.
- Mainsail crew, Crowsnest and its issue tracker (Logitech focus and exposure behavior, Raspberry Pi 5 camera setup).
- Clever Creations, Klipper Webcam Guide (Logitech C270 and C920 use with Klipper).
- Raspberry Pi, Camera Module 3 and Jeff Geerling's launch coverage (launch prices).
- Obico, Webcam configuration for Klipper (primary camera, nozzle camera).