TPU on the Plus 5 in brief
- Dry it. QIDI's TPU guide says 65–75 °C for 8 hours.
- Avoid the rear tube. Feed the TPU straight into the toolhead from above, from a dryer or a top spool holder.
- Load by hand. The touchscreen's Load step often fails with TPU. A slow manual extrude at 230 °C works.
- Unload with caution. The screen's Unload may fail with TPU. Use it carefully, holding the cutter lever in while it runs.
- If it jams, QIDI's Max4 videos for the hot end and the extruder gears also fit the Plus 5.
Why TPU jams
TPU 95A bends like a rubber band. Stiff filaments like PLA and PETG slide through the Plus 5's long feed tube from the spool holder at the back. TPU instead buckles inside the tube, since the tube is wider than the filament, and it bunches up before it reaches the extruder gears.
Fed through that tube, the TPU also never set off the toolhead's run-out sensor, so the printer reported "No filament detected". PETG pushed in the same way set it off at once.
Any drag on the way to the toolhead makes things worse. When the spool resists turning, the gears keep pulling while the soft TPU stretches. The gears then chew a flat spot into it, the filament stops moving and nothing comes out of the nozzle. The chewed TPU can also fold over and wedge itself inside the gear housing. That is how the jam described below began.
Drying TPU
TPU soaks up moisture from the air. Wet TPU strings, bubbles and prints rough surfaces. QIDI's TPU guide gives 65–75 °C for 8 hours. A spool fresh out of its sealed bag can usually go straight in, while one left open for more than a day or two is worth drying first. Between prints, store it in a sealed bag or box with desiccant.
A heated filament dryer handles this, and some can feed the printer while they dry. The one used here is the Creality Space Pi X4, which has two chambers that reach 85 °C. That is also hot enough for nylon. TPU straight out of a warm dryer is even softer than usual, which may make it harder to push through a tube. This is one more reason to feed it directly.
Direct feeding
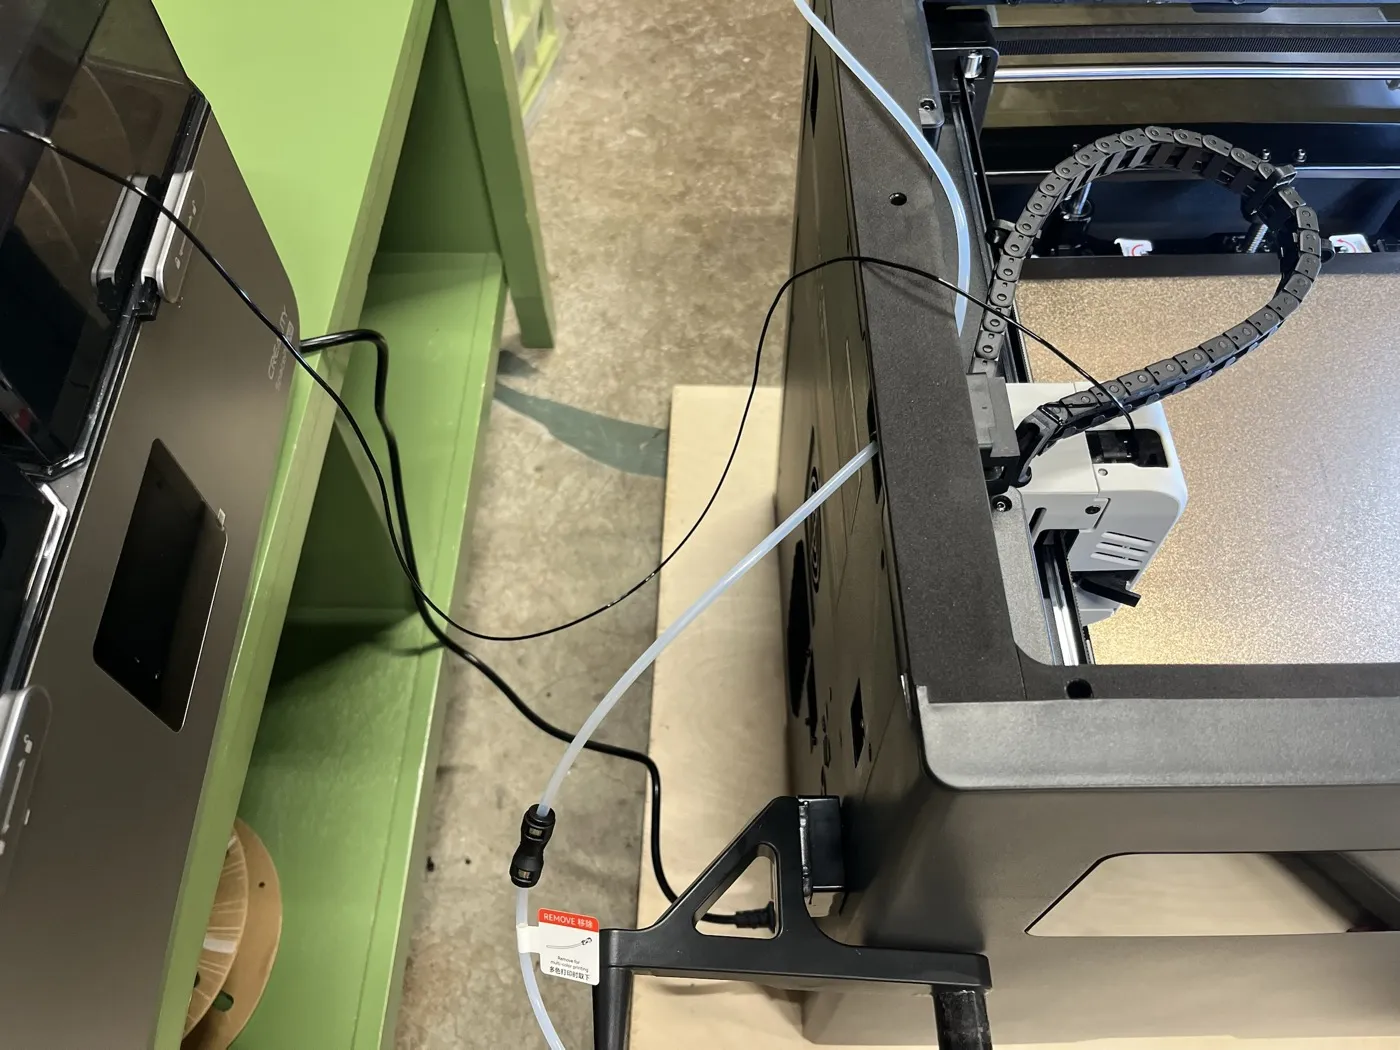
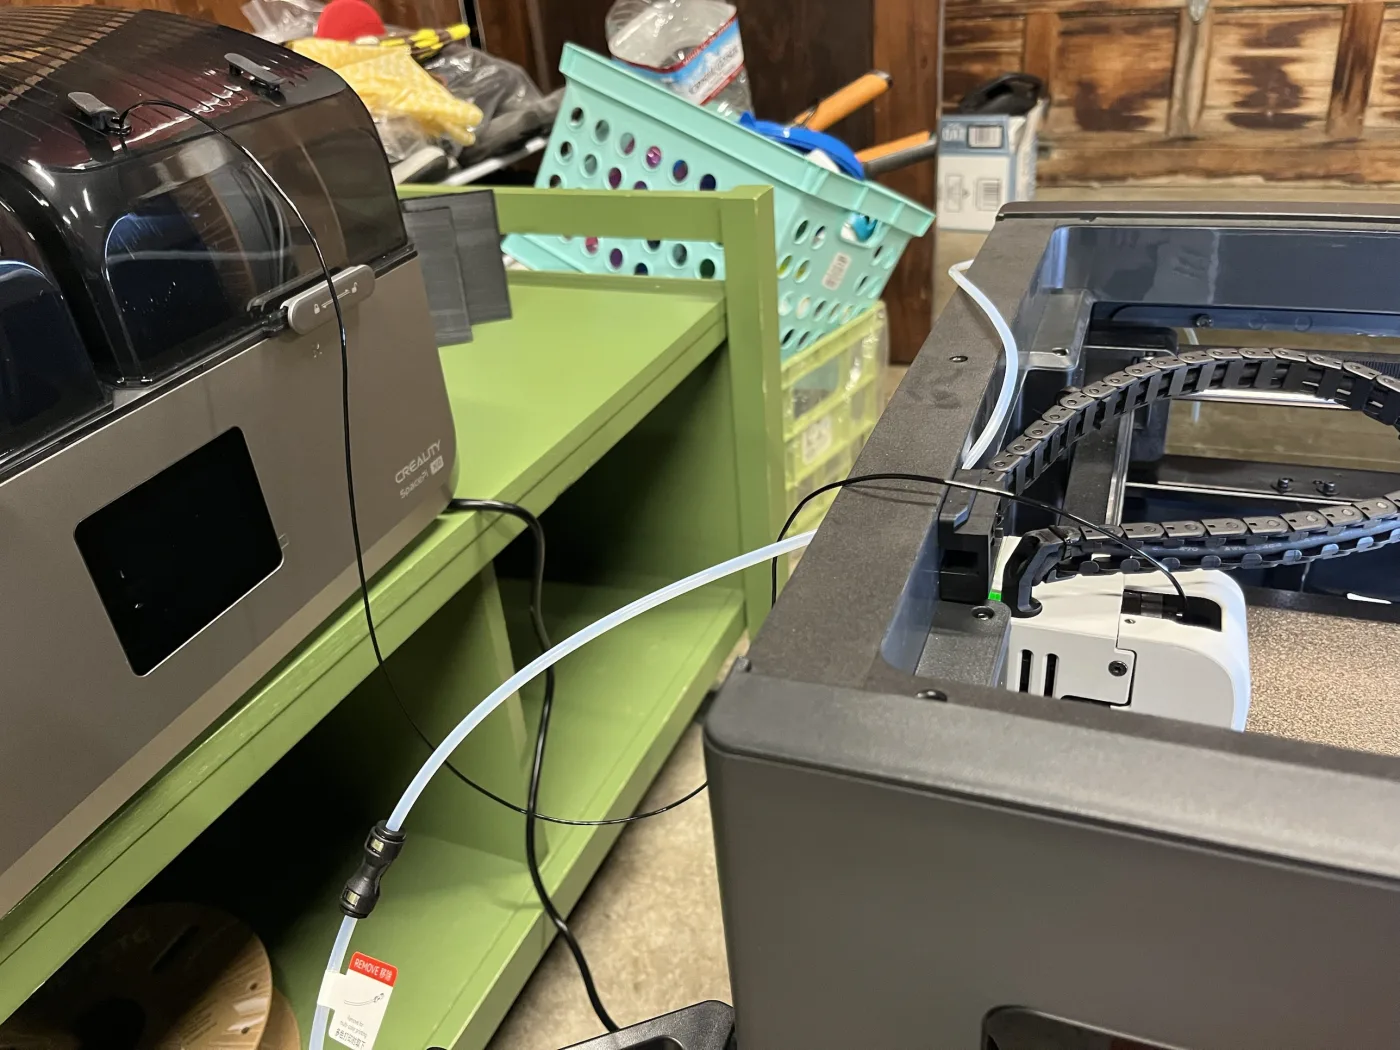
QIDI support's advice for TPU is to remove the feed tube and run the filament straight into the hole on top of the toolhead. Pulled off the tube, the toolhead inlet is open and easy to reach. Fed this way, the TPU set off the run-out sensor every time. QIDI's TPU guide asks for 95A or harder for this setup, and 64D or harder through the optional QIDI Box.
The spool needs to sit above the printer with a short, clear path down to the toolhead. There are two ways to do that.
- From a filament dryer. Place the dryer on a shelf above or beside the printer and lead the TPU from its feed hole down to the toolhead. This also keeps the spool dry for the whole print.
- From a top spool holder. QIDI recommends a top spool holder for the Plus 5, a free model on its QIDI Maker site. It clips on top of the printer and holds the spool right above the toolhead.
Whichever is used, the spool has to turn freely. The X4 dryer holds spools on two passive metal rollers with no axle. A full spool can drag on them, and PETG once refused to feed from it at all. In the X4, the spool has to sit at the far left or far right of its bay, lined up with the feed hole. In the middle of the bay it does not turn properly. A jam on this printer started with the dryer on a low bench behind the printer, feeding through a long, awkward path. With the dryer on a shelf above the printer, the same TPU fed cleanly.
The top spool holder takes about 8 to 9 hours to print. One copy printed in PETG broke while coming off the build plate. Two things went wrong at once. The plate was still warm, and the spool had run out partway through, leaving the top unfinished. Before removing a long print, check the screen for a run-out pause. Then let the plate cool fully. PETG grips the textured plate hard, and a thin layer of glue stick makes it release more easily.
Loading by hand
The touchscreen's Load step heats the nozzle, purges and wipes. With TPU it stopped every time with "Step EXT_WIPE failed. Pausing flow." Pressing Retry on that screen crashed the printer's Klipper firmware, and it needed a firmware restart. A slow manual load worked first time.
- Push the TPU into the top of the toolhead until it stops at the gears.
- Heat the nozzle to 230 °C from the screen or the web interface.
- In the web interface's console, enter
M83and thenG1 E10 F60. This feeds 10 mm at 1 mm per second. - Push gently on the TPU at the inlet while it feeds.
- Repeat with
G1 E20 F60until a clean, even strand comes out of the nozzle.
The gears should turn without clicking. If they click or the filament doesn't move, stop and check for a jam before feeding more.
When switching from PETG or another hotter filament, purge it out first. QIDI's Load Filament page says to load at the hotter filament's temperature plus 10 °C and purge plenty when changing to a cooler one. Leftover PETG in the nozzle is one possible cause of a TPU jam.
Unloading TPU may fail, so take it slowly. QIDI's TPU guide warns that the cutter may not cut all the way through TPU. The screen's Unload step cuts automatically and then pulls, so a half-cut strand can pinch inside the toolhead. Two screen Unloads in a row made a jam on this printer worse. Pressing the cutter lever by hand and pulling did not free the TPU either. Use the screen's Unload with care, holding the cutter lever in while it runs, and stop if the TPU does not move.
Print settings
QIDI's slicer has a "Generic TPU 95A @Qidi X-Plus 5 0.4 nozzle" profile. It prints at 230 °C with a 35 °C bed and a flow cap of 4 mm³ per second. That cap holds the real speed to about 45 mm per second, whatever the speed fields say. The profile itself was not a cause of trouble.
Small, thin TPU parts came out rough and stringy at 230 °C. Each layer was printed in a few seconds, before the one below had cooled. Lowering the nozzle to 220 °C and raising the minimum layer time to 25 seconds fixed it. A small robot paw printed with those settings came out smooth to the top.
Two more settings are worth knowing about.
- Start purge. QIDI's start routine purges 200 mm of filament at 5 mm per second for every material. That is about 12 mm³ per second, three times the TPU profile's cap. It may be enough to make the gears slip on TPU.
- Filament cut before leveling. QIDI's TPU guide suggests turning off the filament cut that runs before bed leveling, in the printer's
gcode_macro.cfg. A cut that fails on TPU can then no longer stop the leveling. The same cut can also be removed from a single print's G-code instead.
On long prints, watch the spool during the second half. On this printer, two early TPU prints went thin and stringy near the end, after 40 to 70 minutes. Both used a damp spool fed through the rear tube. Later prints from a dried spool fed directly did not show it.
Clearing a jam
A jam shows up as a print with nothing coming out of the nozzle, while the printer carries on as normal. The printer's "filament used" figure is the length it asked for, so it keeps rising during a jam. Signs of a jam include the TPU not moving at the inlet, gears that click and Load or Unload steps that fail.
First tries that sometimes work:
- Heat the nozzle to 230 °C, hold the cutter lever in and pull the TPU up gently while the extruder slowly reverses (
M83, thenG1 E-60 F60). - Keep the pull light so the gears do the work. A hard pull just stretches the TPU.
On this printer those tries freed only about 25–40 mm before the TPU stopped moving. The real blockage was deeper, and clearing it took QIDI's two repair videos. Both are made for the Plus 5's sibling, the QIDI Max4, whose toolhead is about 90% the same. QIDI support pointed to them for the Plus 5.
The hot end procedure is the quicker one. Disconnect a few cables, take the hot end out, heat it, hold it with pliers and push a thin rod or hex key down through it. On this printer it pushed out a good amount of black TPU. Even so, the extruder still would not load, so the blockage was higher up.
The gear video is only about two and a half minutes long and moves fast. It looks like a big job, but taking the extruder apart took 10 to 15 minutes. It means removing about 10 to 12 screws, a few plates and a cable. Deep inside the gear housing was a thick piece of TPU, bent into a V and wedged across the gears. Once it was pulled out with pliers and everything went back together, the printer loaded and printed normally.
Tips for the teardown:
- Pause the video often, since it skips through some steps quickly.
- Keep the screws in order, in small piles, one pile per step.
- Take a photo before removing each part, to check the reassembly against.
- Good light and a second pair of eyes help with the small parts.
- QIDI's warranty excludes "unauthorized" disassembly. Email QIDI's Plus 5 support first and ask which steps to follow. Replies here came within a few hours, allowing for the time difference.
TPU feed video
The blog post 3D Printer Challenges tells the story of this jam from start to finish. For choosing a printer and the plastics used for robot parts, see 3D Printers for Robot Parts.
Sources
- QIDI support email reply, October 29, 2026 (direct feed, top spool holder, TPU guide).
- QIDI wiki, Plus 5 TPU printing guide (in Chinese) and Load Filament.
- QIDI Maker, Top spool holder for Plus5.
- QIDI Tech on YouTube, Max4 Hotend Clog Removal Guide and Max4 Extruder Clog Removal (Gear Version) Guide.
- Hands-on use of a QIDI Plus 5 with ELEGOO TPU 95A, October 27 to November 2, 2026.