Introduction to 3D printing
A 3D printer builds a solid object one thin layer at a time, following a digital model. The most common kind, called FDM (fused deposition modeling) or FFF, works a bit like a robotic hot glue gun. It pulls a thin plastic thread called filament from a spool, melts it in a heated nozzle and traces each layer onto a flat bed. When a layer is done, the nozzle rises a fraction of a millimeter and draws the next one on top. A typical layer is 0.2 mm thick, so a part 5 cm tall has about 250 layers.
Printing is slow compared with factory molding. A small bracket takes under an hour, while a full robot body can take days of printing spread over many parts. The upside is that each part costs only the plastic it uses, often a few cents to a few dollars. A new design can also be printed the same day it is drawn.
For quick suggestions of low-cost printers for robotics, skip ahead to Budget printers or the Summary for a first printer.
Common uses
Home printers make replacement parts, tool holders, organizers, toys, cosplay props and miniatures. Engineers use them to prototype a product before paying for molds. Dentists print aligner molds and surgical guides, and factories print jigs that hold parts during assembly.
For robots, a printer turns a design into real parts quickly and cheaply. Common printed robot parts include the following.
- Frames and bodies. Whole chassis, arm links and leg segments, as on the SO-101 arm and the Open Duck Mini biped.
- Brackets and mounts. Holders for motors, cameras, batteries and circuit boards.
- Gears and gearboxes. Printed cycloidal drives and planetary gearboxes are common in hobby arms and legs, such as the Berkeley Humanoid Lite.
- Grippers and hands. Fingers, jaws and soft fingertips printed in flexible plastic.
- Wheels, tires and feet. Rigid hubs with rubbery printed tires or foot pads.
Printing also makes repairs easy. A builder whose printed part breaks can print a new one rather than order it, and many designers share their files for free.
From model to printed part
- Get or draw a model. Robot projects share their parts as STL, 3MF or STEP files, usually on GitHub or sites like Printables and MakerWorld. Builders who design their own parts use CAD programs such as Fusion, Onshape or the free FreeCAD.
- Slice it. A program called a slicer cuts the model into layers and writes the nozzle's path. Common free slicers are Bambu Studio, PrusaSlicer, OrcaSlicer and UltiMaker Cura. Some projects ship ready-made slicer settings, called profiles, for a specific printer.
- Print it. The sliced file goes to the printer over Wi-Fi, USB or a memory card. Many newer printers have a camera to watch prints remotely.
- Clean it up. Supports (temporary scaffolding under overhangs) are snapped off, and holes may be drilled to exact size or fitted with heat-set threaded inserts so screws hold well.
A few slicer settings come up often in DIY build guides.
- Infill. Printed parts are usually not solid inside. Infill is the percentage of the inside filled with a honeycomb or grid pattern. 15–30% is typical for robot parts, and more infill makes a part stronger and heavier.
- Walls. The number of solid outer layers. Extra walls often add more strength than extra infill. A part is also weaker across its layers than along them, so the direction it is printed in changes its strength. Quadruped Design Validation shows how builders check this for robot legs.
- Layer height. Thinner layers look smoother but take longer to print.
- Supports. Needed under parts that hang in the air. Good designs keep them to a minimum.
Printer types
| Type | How it moves | Strengths | Weaknesses |
|---|---|---|---|
| Bed slinger | The bed slides back and forth, and the nozzle moves side to side and up | Cheapest, simple to repair, open for easy access | Slower, takes more desk depth, no enclosure for heat-sensitive plastics |
| CoreXY (often enclosed) | The nozzle moves in both directions inside a box frame, and the bed only lowers | Fast, and an enclosure keeps heat in for ABS, ASA and nylon | Costs more, and the box takes more space |
| Resin (SLA, MSLA) | A light source hardens liquid resin layer by layer | Very fine detail and smooth surfaces | Small build area, messy and smelly resin, parts can be brittle |
| Industrial (SLS, MJF, continuous fiber) | Fuses powder with a laser or heat, or lays carbon fiber into plastic | Strong parts with no supports | Thousands of dollars or more, usually reached through print services |
Almost every hobby robot plan assumes an FDM printer. Resin printers suit small detailed parts, and a few research builds order industrial prints for parts that take high loads. The ODRI leg test stand, for example, uses resin-printed pulleys.
Filaments for robot parts
| Filament | Good for | Watch out for | Needs |
|---|---|---|---|
| PLA | Most printed robot parts. Stiff, easy to print and cheap. | Brittle under snapping and impacts, softens in a hot car or near warm motors | Any printer |
| PETG | Parts that flex, take impacts or sit near warm motors | Strings a little, sticks very hard to some beds | Any printer |
| ABS / ASA | Tough, heat-resistant parts. ASA also handles sunlight outdoors. | Warps and cracks in drafts, gives off fumes | Enclosure and ventilation |
| TPU | Rubbery feet, tires, bumpers and soft fingertips | Slow to print and can jam some extruders (see the QIDI Plus 5 TPU Guide) | Works best with a direct-drive extruder |
| Nylon and carbon-fiber blends | Strong, stiff gears and load-bearing parts | Absorbs moisture from the air, so it must be dried | Enclosure, and a hardened nozzle for fiber blends |
DIY build guides usually say which plastic each part needs. The Vorpal hexapod asks for ABS or PETG because its servo pockets flex to snap the servos in, and PLA can crack there. Upkie is designed around PETG. The Open Duck Mini, RookiDroid hexapod and UMI gripper mix rigid PLA or PETG with TPU for feet and fingers.
Printer features that matter for robots
- Build volume. The largest part a printer can make. Most DIY robot plans fit on a 200 × 200 mm bed or slightly larger. Berkeley Humanoid Lite asks for at least 200 × 200 × 200 mm, ExoMy for 202 × 202 × 110 mm and Faze4 for 250 × 210 × 200 mm. A 180 mm printer handles small robots but may need some parts split.
- Reliability. Robot bodies run to dozens of parts and days of printing. Printers that level their own beds and calibrate themselves fail far less often, which matters more than raw speed.
- Accuracy. Robot parts have to fit bearings, screws and servo horns. Several plans recommend specific brands because their parts come out the right size without tuning.
- Enclosure. A closed box is needed for ABS, ASA and nylon, and it keeps dust and drafts off long prints. It is not needed for PLA, PETG or TPU.
- Multi-color units. Add-ons like Bambu Lab's AMS swap between several spools automatically. They are handy for colorful parts or for printing supports in a different plastic. Robots rarely need them, so the printer-only price is usually the better buy.
A printer is not strictly required. Online print services make parts from uploaded files and mail them out, and some plans, like the JetBot and Stack-chan, suggest them. Libraries and makerspaces often have printers too. For a robot with many parts, though, owning a printer usually costs less than ordering prints, and it makes redesigns and repairs quick.
Fumes and safety
Melting plastic releases two kinds of air pollution. Ultrafine particles are specks so small that they are breathed in like a gas and can reach the lungs and blood. Volatile organic compounds (VOCs) are gases, and some of them are irritants or can cause cancer. Neither can be seen, and many have little smell. Researchers at UL's Chemical Insights institute and at NIOSH, the US workplace safety agency, have measured both from desktop printers.
The amount depends mostly on the plastic and the nozzle temperature, and hotter printing releases more.
| Plastic | Emissions | Main concern |
|---|---|---|
| ABS / ASA | Highest of the common filaments in UL's tests. ASA is a close relative and needs the same care. | Styrene gas and the most particles |
| Nylon | Lower than ABS, higher than PLA | Caprolactam gas, and many particles in UL's filter tests |
| PLA | Lowest of the three | Still releases some VOCs and particles |
| Resin | A different hazard | Liquid resin and the alcohol used to wash parts (see below) |
UL and university safety offices recommend the following steps for filament printers.
- Choose PLA where it works. Most robot parts print well in PLA or PETG. ABS, ASA and nylon are best kept for parts that truly need them.
- Ventilation. A room with an open window or an exhaust fan works best, with the printer kept away from return air vents. Small closed rooms like bedrooms and dorm rooms are a poor place for long prints.
- Enclosure and filters. An enclosure keeps fumes in one place, so they can be filtered or sent outdoors through a duct. A HEPA filter traps particles, and an activated carbon filter soaks up VOCs. In UL's tests the two together removed most particles. Carbon fills up over time, so filters need replacing on the maker's schedule. A duct to the outdoors is the strongest option, and UL advises asking for test results before trusting a built-in filter.
- Room air cleaner. A purifier with both HEPA and activated carbon filters is a fallback where venting outdoors is not possible.
- Distance. Standing close to a running printer greatly increases exposure. A camera or viewing window is safer for watching prints, and the printer is best kept away from where people sit, work and sleep. Plain dust masks do not stop VOCs or ultrafine particles.
- Lower temperatures. The lowest nozzle and bed temperatures within the filament maker's range release the least.
- Certified printers. Printers certified to the ANSI/CAN/UL 2904 standard have been tested for lower emissions.
- Cleanup. Once the printer cools, clearing plastic buildup from the nozzle and bed cuts fumes on the next print. Wiping nearby surfaces with a damp cloth and washing hands afterward removes settled particles.
Resin printers bring different risks. Liquid resin is a sensitizer, so repeated skin contact can cause a lasting allergy. Formlabs advises gloves whenever handling liquid resin or unwashed parts, and soap and water if resin touches skin. Parts are usually washed in isopropyl alcohol, which is flammable and irritates skin and lungs. It belongs in a ventilated spot away from flames. Parts that are not fully cured can still cause reactions, and liquid resin should never go down a sink. Small leftovers are cured solid before going in the trash. Ventilation needs vary by resin, so each resin's safety data sheet (SDS) is the guide.
Any printer's nozzle and bed get hot enough to burn skin. Turning the printer off and letting it cool before cleaning or repairs avoids burns.
Printers named by DIY robot plans
Most DIY robot plans only ask for "a 3D printer", sometimes with a minimum bed size. The plans below name specific printers, either as a recommendation or as the printer the designers used. The printers they mention are covered in the sections that follow.
| Plan | Printers named | Details |
|---|---|---|
| SO-101 arm | Prusa MINI+, Creality Ender 3, Bambu Lab A, P and X series, UP Plus 2 | Listed as sample printers. The files come in two layouts, for 220 × 220 mm beds and 205 × 250 mm beds. |
| LeKiwi | Bambu Lab P1S, plus Bambu Lab or Prusa in general | Tested on a P1S with generic PLA |
| XLeRobot | Bambu Lab A1 | Every part in its photos and videos was printed on an A1 |
| ToddlerBot | Bambu Lab printers | Highly recommended by the team for part accuracy, with ready-to-print files on MakerWorld |
| Berkeley Humanoid Lite | Bambu Lab X1C, Creality Ender-3 V3 SE | Any printer of at least 200 × 200 × 200 mm works. The X1C is recommended and its settings are given, and the Ender-3 V3 SE was also tested. |
| Aero Hand Open | Bambu Lab X1C | All parts were printed on an X1C, and any printer with a 200 × 200 mm bed works |
| TidyBot++ | Bambu Lab X1-Carbon and X1E, Prusa MK3.5 and MK3.9 | Bambu Lab or Original Prusa printers are recommended. The plan advises against the Creality Ender-3, Ender-3 S1 Pro and Ender-5 S1 because of print quality. |
| Upkie | Prusa i3 MK3S+ | All parts were printed several times on one, in PETG |
| RookiDroid hexapod | Bambu Lab A1 | No printer is recommended, but the ready-made print project is set up for an A1 |
Bambu Lab and Prusa printers come up most, mainly because they print accurate parts with little tuning. The X1C and the Prusa i3 MK3S+ are no longer sold, and their current replacements are listed in Older printers in DIY plans.
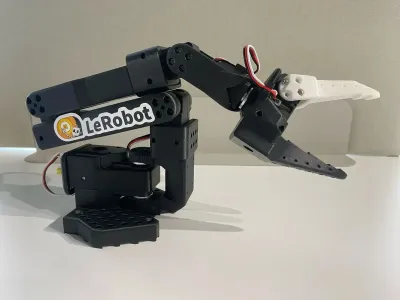 SO-101~$230 DIY parts (pair),…
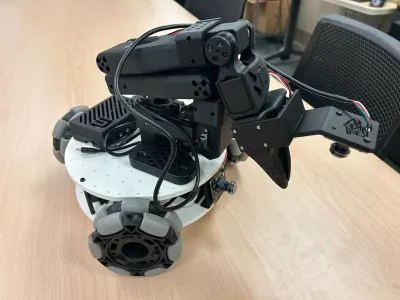 LeKiwi~$450 – $870 complete
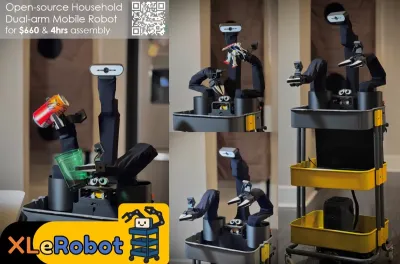 XLeRobot 0.4~$800 – $900 all-in
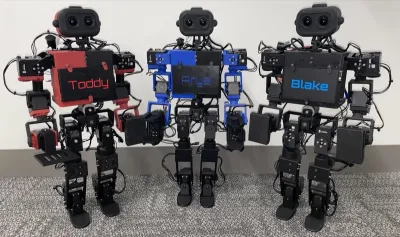 ToddlerBot 2.0~$6,000 DIY · $4,299 built
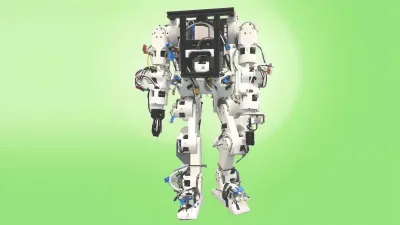 Berkeley Humanoid Lite~$4,300 DIY BOM
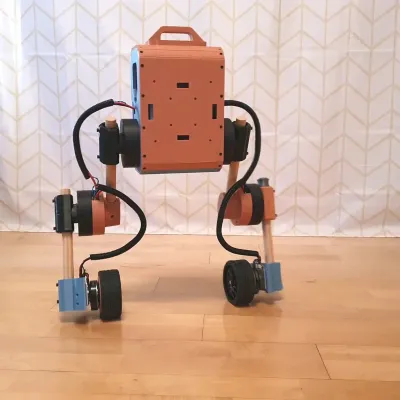 UpkieDIY (open source)
Budget printers (under $400)
All of these print PLA, PETG and TPU well, which covers most robot parts. Prices are from each maker's US store in October 2026 and change often, and printers are frequently on sale.
| Printer | US price | Build volume | Type | Notes |
|---|---|---|---|---|
| Creality Ender-3 V3 SE | $199 | 220 × 220 × 250 mm | Bed slinger, open | The cheapest well-known option. Tested by the Berkeley Humanoid Lite team. Needs more hands-on tuning than a Bambu Lab printer. |
| Bambu Lab A1 mini | $219 ($329 with AMS lite) | 180 × 180 × 180 mm | Bed slinger, open | Small, quiet and very easy to use. Fine for small robots like Otto, though larger plans may not fit. |
| Bambu Lab A1 | $299 ($399 with AMS lite) | 256 × 256 × 256 mm | Bed slinger, open | A popular first printer among robot builders. XLeRobot's parts were printed on one, and it fits nearly every hobby plan. |
| Elegoo Centauri Carbon 2 | $359 ($449 with 4-color unit) | 256 × 256 × 256 mm | CoreXY, enclosed | The cheapest enclosed option here, with a hardened nozzle for carbon-fiber filaments |
Mid-range printers ($400 to $1,300)
These add an enclosure, more speed or both. An enclosure opens up ABS, ASA and nylon for tougher parts.
| Printer | US price | Build volume | Type | Notes |
|---|---|---|---|---|
| Bambu Lab P1S | $399 ($549 with AMS) | 256 × 256 × 256 mm | CoreXY, enclosed | A common robot-lab printer. LeKiwi's parts were tested on one. |
| Bambu Lab P2S | $549 ($749 with AMS 2 Pro) | 256 × 256 × 256 mm | CoreXY, enclosed | The P1S's newer sibling, with a hardened nozzle for carbon-fiber filaments |
| Bambu Lab X2D | $649 ($899 with AMS 2 Pro) | 256 × 256 × 260 mm | CoreXY, enclosed, two nozzles | The successor to the X1C named by several plans. A 65 °C heated chamber suits nylon and ABS, and the second nozzle can print supports or TPU. |
| Prusa MK4S | $709 as a kit, $999 assembled | 250 × 210 × 220 mm | Bed slinger, open | The current version of the Prusa line that Upkie and TidyBot++ were built with. Open-source and easy to repair. |
| Prusa CORE One+ | $999 as a kit, $1,299 assembled | 250 × 220 × 270 mm | CoreXY, enclosed | Prusa's enclosed printer, with active chamber temperature control |
High-end printers (over $1,300)
These suit large robots, research labs and builders who print a lot. A cheaper printer makes the same plastic parts, so the extra money buys size, materials and convenience.
| Printer | US price | Build volume | Type | Notes |
|---|---|---|---|---|
| Bambu Lab H2D | $1,749 ($1,999 with AMS) | 325 × 320 × 325 mm (one nozzle) | CoreXY, enclosed, two nozzles | A larger, heated-chamber printer for big robot parts and engineering plastics |
| Prusa XL+ | $2,299 (one tool), $3,899 (five tools) | 360 × 360 × 360 mm | CoreXY tool changer, open | Very large parts, and up to five separate print heads for mixing rigid and flexible plastics. An enclosure is an extra. |
| Formlabs Form 4 | From $2,625 | 200 × 125 × 210 mm | Resin | Fine detail and smooth surfaces for small precise parts like gears and hand components. Needs washing and curing after each print. |
Industrial printers that lay continuous carbon fiber into nylon, such as those from Markforged, make parts far stiffer than desktop prints. They cost thousands of dollars and are sold by quote, so hobby builders usually reach them through print services.
Older printers in DIY plans
Several plans were built on printers that have since been replaced. Their print settings still work on the newer models with little or no change.
- Bambu Lab X1 Carbon (X1C) and X1E. Named by Berkeley Humanoid Lite, Aero Hand Open and TidyBot++. Bambu Lab ended the X1 series on March 31, 2026, and the X2D is its successor.
- Prusa i3 MK3S+, MK3.5 and MK3.9. Used for Upkie and TidyBot++. The MK3.5 and MK3.9 are updated versions of the MK3, and the MK4S is Prusa's current model of the same style.
- Creality Ender 3. The original Ender 3 was the classic cheap printer and is listed by the SO-101. TidyBot++ advises against the older Ender models, and the Ender-3 V3 SE is the current budget model.
- Prusa MINI+. Listed by the SO-101 and still sold, now as a $549 bundle with an enclosure. Its 180 mm bed matches the Bambu Lab A1 mini.
Summary for a first printer
- Lowest cost. The Creality Ender-3 V3 SE ($199) or Bambu Lab A1 mini ($219), for small robots and learning.
- Most robot plans. The Bambu Lab A1 ($299), or a P1S ($399) for an enclosure. Both fit nearly every hobby plan on this site and need little tuning.
- Tough plastics and heavier robots. A Bambu Lab P2S ($549) or X2D ($649), or a Prusa CORE One+ ($999 as a kit, $1,299 assembled).
- Very large or precise parts. The Bambu Lab H2D ($1,749) or Prusa XL+ (from $2,299) for size, or a Formlabs Form 4 resin printer (from $2,625) for detail.
Filament adds a little to each build. A 1 kg spool of PLA costs about $16 to $33 from the printer makers, and a small robot often uses less than half a spool. The DIY Robot Plans page lists free designs to print, and the Parts of a Robot and Servo Guide pages cover the motors and electronics that go inside them.