I've been using my 3D printer a lot in the last few days to make parts for my robot, LocksleyFox, to the point that I'm printing almost the entire day, from morning to evening with little breaks, and even during the night I'll be printing for a few hours. That's because I want to get all the legs, the body and all the feet printed, so that when the motors arrive, hopefully in the next few days, I have everything ready.
So the good news is I have most of the parts printed. The less good news is that I almost broke my 3D printer. I wanted to talk about that briefly so you don't run into the same problem, although fortunately it seems like it worked out in the end.
Unload
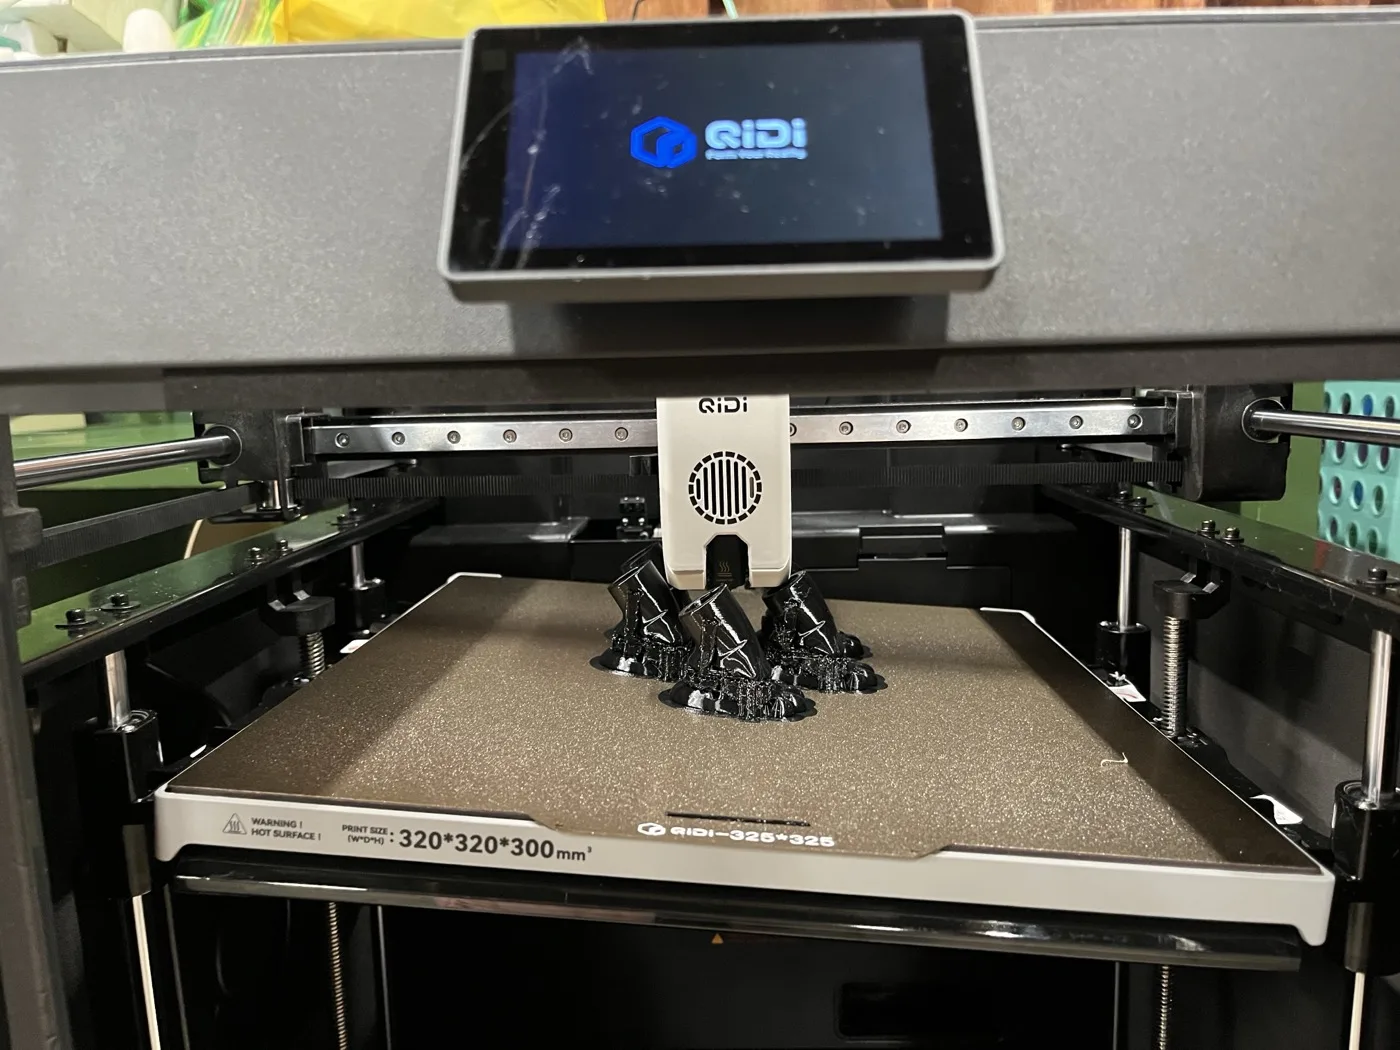
In the middle of printing all these things back to back, I had just finished a TPU job. Keep in mind TPU is the material that's closer to rubber. It's softer and more pliable. I had five paws in the middle of the plate, and the job had just finished.
It was still a bit hot, and although I probably could have taken it out, I wanted to let it cool down before I took the plate out. I would probably need a scraper, because those TPU paws are typically stuck pretty well to the plate, although with the included scraper I'm usually able to get them off in just a minute or two.
So while I was waiting, I thought I would go ahead and change the filament from TPU to PLA. Of course, I just went to the menu and clicked on Unload, and I thought it would just unload as usual.
Unfortunately, a few seconds later I saw the plate start rising toward the extruder, which is the big white part on the top that actually pushes the filament out through a heated nozzle. On this printer the extruder only moves side to side, and the plate is what moves up and down. The plate was still pretty high up in the machine, and it just kept rising. The extruder was about to crush the paws against the plate. I didn't know what to do, so I just stared at it in a daze, and the paws hit the nozzle and the plate kept going up, starting to crush them.
Soon after there was a groaning sound, and then I noticed the plate started going diagonal. The plate is lifted by several motors, and with the paws in the way they stopped moving together. Some of the corners were higher than the others, maybe roughly at a 15 or 20 degree angle, which looked very unnatural. I took a picture, which you can see below, and I was kind of freaking out.
Cutting the power
While it was still trying to push up, after at least two or three seconds, I just shut it off, because I didn't know what else to do. I didn't see an easy way to stop it, and sometimes the stop button doesn't always work for some of those actions. So I just shut off the power, and that stopped it.
I tried to pull out the plate at that point, but a few of the paws were stuck really well, and it would have been hard to get the scraper in there with the paws squished against the nozzle. So I just turned it back on and waited. Nothing happened to begin with, but once it powered on, the plate eventually moved down a bit, to the point where I was able to take it out quickly before it would move back and bump the paws into the nozzle.
Calibration
After taking the paws off, I put the plate back on, because I wasn't sure if it was necessary for the calibration or not. I'm still not sure if it was, but I put it on just in case. Then I did a calibration, which is the thing you run when you first buy the printer. It's about a 15 minute run with five or six steps.
The good news is that in the middle of that calibration, it took the plate all the way down to the bottom, and the corners that were high because of the incorrect angle of the plate went down as well, flattening it. There was this scary groaning sound again, a creak for a few seconds, and it scared the heck out of me. But after all that, it finished the calibration a few minutes later, and the plate looked relatively flat.
After that, I switched the filament and did another print, and I was paying more attention to it. At the beginning of every job, the printer does what's called leveling, where it touches the nozzle down on a bunch of areas all over the plate. From what I researched, that's trying to determine how close the plate is and what angle it is at. Visually, the plate was pretty flat. Even if there was a slight difference in angle, I believe the algorithms would be able to handle it, at least according to what I read online. So that's good news.
Manual adjustment
I also heard, although I didn't try this myself, that you can turn the threaded rods, called lead screws, that hold up the corners of the plate, to even it out yourself. That's another thing I could have tried first, but I was less comfortable with it. I could probably have lowered the entire plate if I went little by little on all the lead screws around it, until I had enough space to get the paws out. That might have been safer, but like I said, I wasn't too comfortable with physically tweaking it. I just left it to luck, to have it lift up on its own after I turned it back on.
Back to printing
I'm doing a print job now, and it looks pretty good so far. I don't see any major problems. It's a rectangular holder for something called an IMU (inertial measurement unit), which is used to know where the robot is in space, whether it's turned, or tilted up or down. Phones have one as well. It doesn't give a GPS position, but more relative information: is it moving, is it turning, that kind of thing. That's pretty important for the dynamic walking policy. I'm looking at it right now, and it looks pretty solid. Fortunately, I don't think anything's broken, which is great.
The only thing I have to say is that it may have been saved because I had TPU in there, which again is a pretty soft filament. Had it been a harder one, who knows what would have happened. It probably would have been okay, but it might have ended up in a worse state where the automatic calibration wasn't enough, and I might have had to fix it manually, or in the worst case, it might actually have broken something.
Hopefully this is useful to those of you who own a 3D printer or are thinking of buying one. For more on printing soft parts on this machine, see printing TPU on the QIDI Plus 5. Until next time.